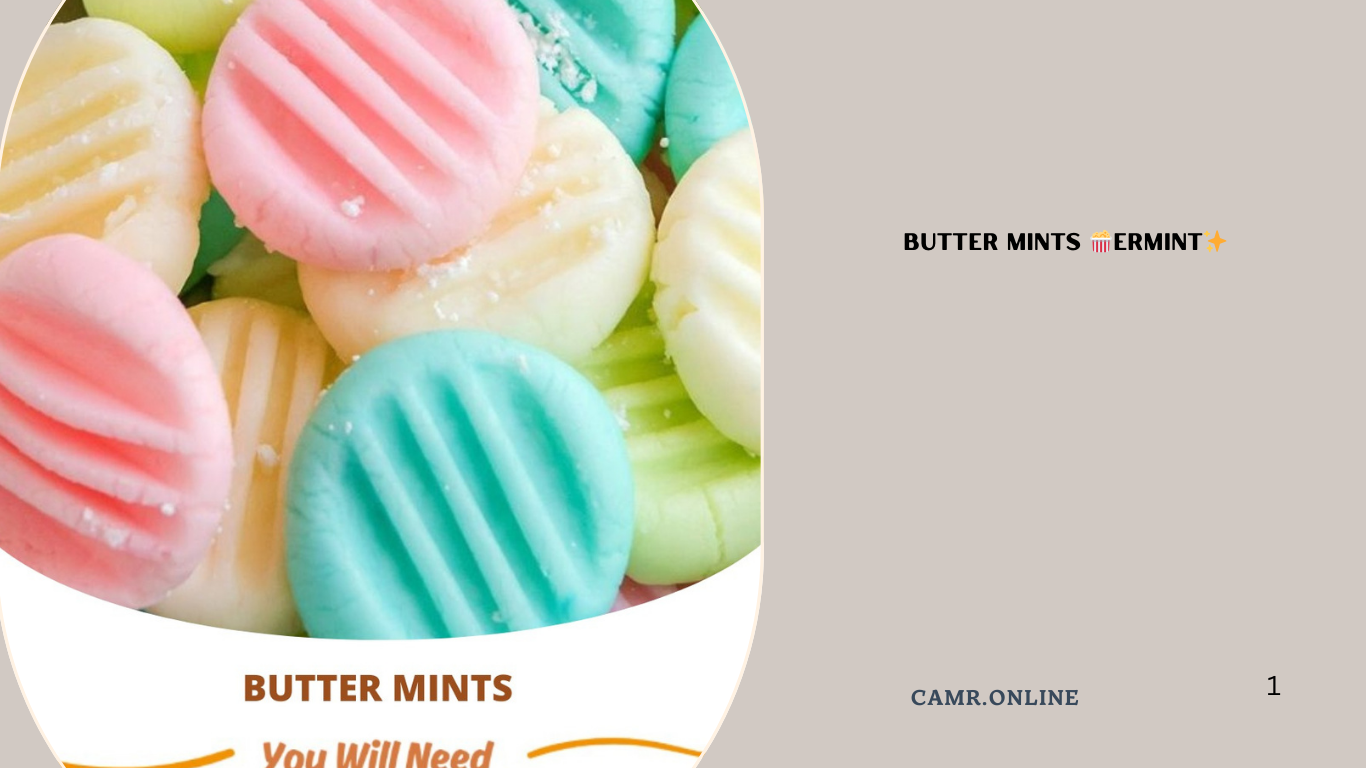
If you’re in the mood for a refreshing, homemade treat that’s as simple to make as it is delightful, these Butter Mints are your ultimate candy creation! With just a handful of ingredients—butter, cream, powdered sugar, peppermint extract, and food coloring—you can whip up a batch of creamy, minty candies that rival store-bought options. Perfect for holidays, gifting, or simply satisfying your sweet tooth, this recipe delivers pure minty goodness.
Let’s dive into how you can create these charming butter mints step by step!
Why You’ll Love These Butter Mints
- Minty Refreshment : The perfect balance of cool peppermint and rich butter creates an irresistible flavor.
- Customizable Color : Adjust the food coloring to achieve your desired shade—from pastel hues to vibrant tones.
- No-Cook Recipe : Requires no baking, making it ideal for beginners or quick projects.
- Easy to Gift : Package them in festive boxes or cellophane bags for a thoughtful present.
Ingredients You’ll Need
- 1 stick unsalted butter, softened
- 1 tablespoon whipping cream
- 4 cups powdered sugar, divided (plus more for dusting)
- ½ teaspoon pure peppermint extract
- 1–4 drops food coloring (or more if desired for a brighter color)
Optional:
- Crushed candy canes or sprinkles for decoration
Step-by-Step Instructions
Step 1: Cream the Butter and Cream
In a large mixing bowl, beat the softened unsalted butter and whipping cream together until smooth and creamy. This will help lighten the mixture and create a smoother texture.
Step 2: Add Powdered Sugar Gradually
Gradually add 3 cups of powdered sugar to the butter mixture, one cup at a time, beating on low speed to avoid creating a cloud of sugar. Once incorporated, increase the speed and continue beating until the mixture becomes light and fluffy.
Pro Tip: Sift the powdered sugar if you want an ultra-smooth texture.
Step 3: Infuse with Peppermint Flavor
Stir in the pure peppermint extract , ensuring it’s evenly distributed throughout the mixture. Taste and adjust the amount of extract if you prefer a stronger or milder mint flavor.
Step 4: Add Food Coloring
Mix in 1–4 drops of food coloring (or more, depending on how vibrant you want the candies to be). Start with fewer drops for a softer hue and gradually add more until you achieve your desired color.
Tip: For a classic mint green, use green food coloring. Experiment with red or blue for fun variations!
Step 5: Dust and Shape
Sprinkle a generous amount of powdered sugar onto a clean surface to prevent sticking. Transfer the mint mixture to the sugared surface and sprinkle the remaining 1 cup of powdered sugar over the top. Knead the mixture gently with your hands until it forms a smooth dough-like consistency.
Shape the dough into small balls, discs, or rectangles using your hands or cookie cutters. If the mixture feels too sticky, dust your hands or tools with additional powdered sugar.
Step 6: Chill the Mints
Place the shaped butter mints on a plate or tray lined with wax paper. Cover them loosely with plastic wrap and refrigerate for 1–2 hours , or until firm. Chilling helps the mints hold their shape and intensifies the flavors.
Step 7: Decorate and Serve
Once chilled, remove the mints from the refrigerator. Optionally, roll them in crushed candy canes or sprinkle with colorful sprinkles for added flair. Store the mints in an airtight container in the fridge until ready to serve.
Serve cold or let them sit at room temperature for a few minutes before enjoying their melt-in-your-mouth goodness!
Customization Ideas
While the classic version of these butter mints is delicious, here are some ideas to switch things up:
- Different Flavors : Swap out peppermint extract for other flavors like almond, vanilla, or citrus.
- Holiday Colors : Use seasonal colors like red and green for Christmas or pastel shades for spring.
- Crushed Candy Coating : Roll the mints in crushed hard candies or chocolate sprinkles for extra crunch.
- Layered Mints : Create swirls of different colors or flavors by combining two batches of mint dough.
Tips for Success
To ensure your Butter Mints turn out perfectly every time, keep these tips in mind:
- Softened Butter : Ensure the butter is softened but not melted for easier mixing and better texture.
- Knead Gently : Handle the mixture lightly to avoid compacting it, which could make the mints dense.
- Chill Thoroughly : Allowing the mints to chill ensures they maintain their shape when served.
- Store Properly : Keep leftovers in the refrigerator to preserve freshness and prevent melting.
Nutrition Information (Approximate per serving)
- Calories: 80
- Fat: 3g
- Carbohydrates: 14g
- Protein: 0g
- Fiber: 0g
Conclusion
These Butter Mints bring together the comforting richness of butter with the invigorating coolness of peppermint for a treat that’s both nostalgic and modern. Their ease of preparation and customizable nature make them perfect for any occasion—or simply indulging in something sweet.
So gather your ingredients, prep your workspace, and let’s create something truly special. Whether enjoyed fresh from the fridge or gifted to loved ones, these mints are sure to become a favorite!
If you enjoyed this recipe, be sure to explore our other easy and flavorful candy recipes. Happy baking (and candy-making), and may your kitchen adventures always end in success! 🍬✨