
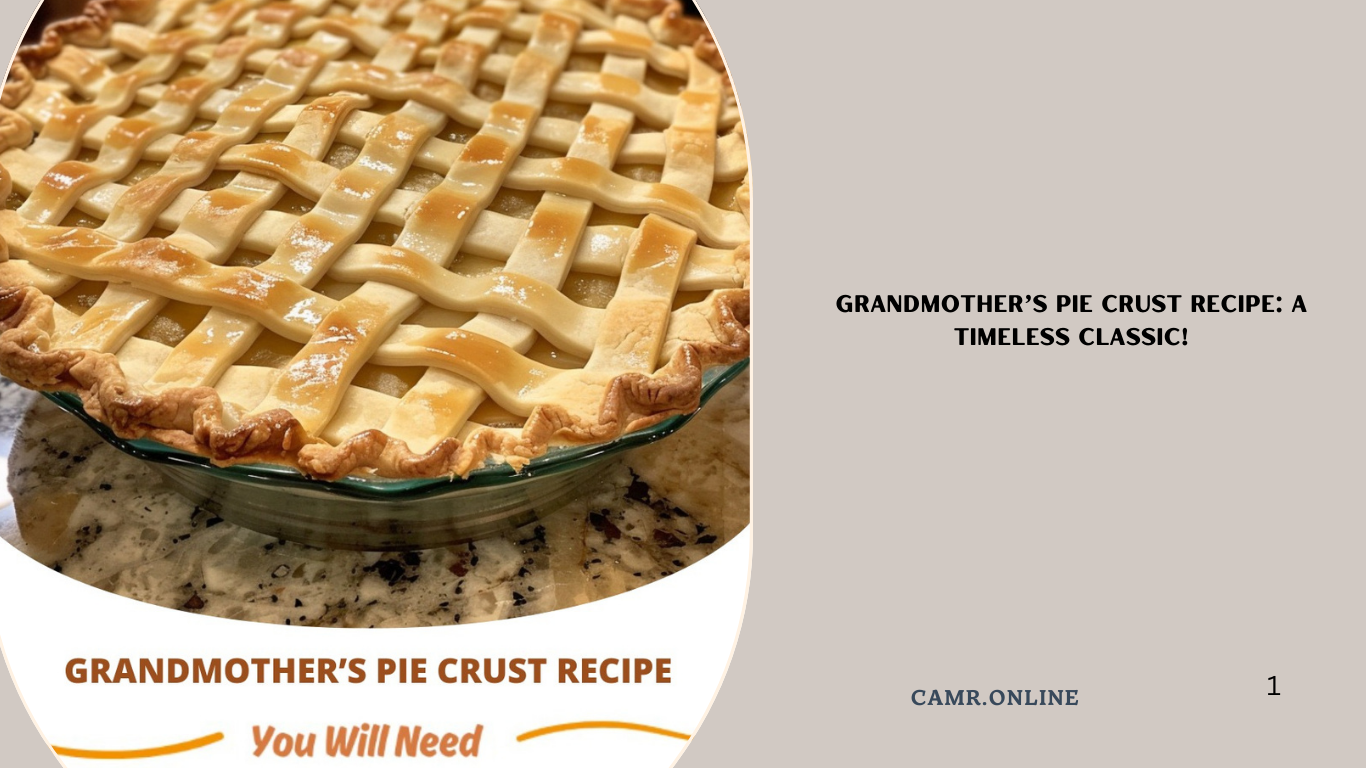
There’s nothing quite like a perfectly flaky, buttery pie crust to elevate any dessert or savory dish. This Grandmother’s Pie Crust Recipe is the secret to creating tender, golden-brown crusts that will make your pies unforgettable. Passed down through generations, this recipe combines simple ingredients with timeless techniques to deliver consistent results every time.
In this article, we’ll guide you step-by-step through making this delicious pie crust, share tips for success, and provide ideas for customization. Let’s get started!
Why This Recipe Stands Out
Before diving into the details, here’s why this pie crust recipe deserves a spot in your kitchen:
- Flaky Perfection : The combination of cold butter and ice water ensures layers of crispiness.
- Simple Ingredients : With just four main ingredients, it’s easy to whip up anytime.
- Versatile : Use it for sweet pies, savory tarts, quiches, or even turnovers.
- Family Tradition : Passed down from grandmothers everywhere, this recipe connects us to our roots.
Now let’s explore the ingredients and instructions in detail.
Ingredients You’ll Need
For the Pie Crust:
- 2 1/2 cups all-purpose flour (plus extra for dusting)
(All-purpose flour provides structure while keeping the crust tender.) - 1 teaspoon salt
(Salt enhances the overall flavor profile.) - 1 cup unsalted butter , cold and cut into small cubes
(Cold butter creates steam during baking, resulting in flaky layers.) - 6–8 tablespoons ice water
(Ice water keeps the dough cool and prevents overworking.)
Optional Add-Ins:
- 1 tablespoon sugar (for sweeter pies like apple or peach)
- 1 teaspoon vanilla extract (adds depth to dessert crusts)
- 1/4 cup grated Parmesan cheese (perfect for savory dishes)
Step-by-Step Instructions
Step 1: Prepare Your Workspace
- Chill your tools—use a metal bowl and a pastry cutter if possible, as they stay cooler longer.
- Measure out all your ingredients before starting.
Step 2: Combine Dry Ingredients
- In a large mixing bowl, whisk together the flour and salt until evenly combined.
Step 3: Cut in the Butter
- Add the cubed, cold butter to the flour mixture.
- Use a pastry cutter, fork, or your fingers to work the butter into the flour until the mixture resembles coarse crumbs with some pea-sized chunks of butter remaining. Tip: Work quickly to keep the butter cold.
Step 4: Add Ice Water Gradually
- Sprinkle 6 tablespoons of ice water over the mixture, one tablespoon at a time.
- Stir gently with a spatula or fork until the dough begins to come together. If the dough seems too dry, add more water, one teaspoon at a time.
- Avoid overmixing—the dough should hold together when squeezed but still have visible bits of butter.
Step 5: Form the Dough
- Divide the dough in half and shape each portion into a flat disk.
- Wrap the disks tightly in plastic wrap and refrigerate for at least 1 hour (or up to 2 days). Chilling relaxes the gluten and firms up the butter, ensuring a flaky crust.
Step 6: Roll Out the Dough
- On a lightly floured surface, roll out one disk of dough to about 1/8 inch thickness.
- Gently transfer the rolled-out dough to your pie dish by rolling it around the rolling pin or folding it in half.
- Press the dough into the bottom and sides of the dish, trimming any excess.
Step 7: Assemble and Bake Your Pie
Follow your favorite pie recipe for filling and baking instructions. For blind-baking (pre-baking an empty crust), line the dough with parchment paper, fill with pie weights or dried beans, and bake according to your recipe.
Tips for Success
- Keep Everything Cold : Cold butter and ice water are key to achieving flakiness. Work quickly and avoid warming the dough.
- Don’t Overwork the Dough : Handle the dough minimally to prevent toughening the gluten.
- Rest the Dough : Always chill the dough before rolling it out; this makes it easier to handle and improves texture.
- Use Extra Flour Sparingly : Too much flour can dry out the crust. Dust lightly as needed.
Variations and Customizations
While the classic version is perfect for most pies, here are some ways to customize your crust:
- Herb-Crusted Savory Pies : Mix in chopped fresh herbs like thyme, rosemary, or parsley for savory dishes.
- Spiced Dessert Crusts : Add cinnamon, nutmeg, or ground ginger for holiday-inspired pies.
- Cheesy Quiche Crust : Stir in shredded cheddar, Parmesan, or Gruyère for a rich, cheesy base.
- Nutty Twist : Fold in finely chopped nuts like almonds or pecans for added crunch and flavor.
Troubleshooting Common Issues
Problem: Crust Shrinks During Baking
Solution: Let the shaped crust chill in the refrigerator for 15–30 minutes before filling and baking. This helps set the structure.
Problem: Dough Crumbles When Rolling
Solution: Add a little more ice water, one teaspoon at a time, until the dough holds together better.
Problem: Bottom Crust Gets Soggy
Solution: Pre-bake the crust slightly (blind-baking) or brush it with beaten egg white or melted chocolate before adding wet fillings.
Serving Suggestions
This versatile pie crust works beautifully with a wide range of recipes:
- Sweet pies like apple, cherry, pumpkin, or pecan.
- Savory tarts filled with spinach, feta, or roasted vegetables.
- Individual turnovers stuffed with fruit, meat, or cheese.
- Quiches or pot pies for brunch or dinner.
FAQs About Pie Crusts
Q: Can I freeze the pie crust?
A: Yes! Wrap the dough disks tightly in plastic wrap, then place them in a freezer-safe bag. Freeze for up to 3 months. Thaw overnight in the refrigerator before using.
Q: How do I fix a cracked edge on my pie crust?
A: Simply press the cracks together with your fingers or use leftover scraps to patch them. Brush with water to help adhere.
Q: What if I don’t have a rolling pin?
A: A wine bottle or clean glass jar works well as a substitute for rolling out the dough.
Conclusion
This Grandmother’s Pie Crust Recipe is the foundation of countless delicious desserts and savory creations. By following our detailed instructions and expert tips, you’ll be able to create flawless, flaky crusts that rival those of professional bakers.
So gather your ingredients, roll up your sleeves, and enjoy the satisfaction of crafting something truly special. Happy baking—and happy eating! 🥧✨