
If you’re a fan of pistachios and creamy desserts, these Pistachio Dream Cookie Bars are about to become your new favorite treat! With a buttery shortbread crust, a creamy pistachio filling, and a fluffy whipped topping, these bars are the perfect combination of sweet, nutty, and indulgent. Whether you’re serving them at a party, a potluck, or just enjoying them at home, these bars are sure to impress.
In this article, we’ll walk you through the recipe step by step, share tips for making them even more special, and explain why these bars are a must-try. Let’s get started!
Why You’ll Love These Pistachio Dream Cookie Bars
- Nutty and Creamy: The pistachio flavor is rich and delicious, paired with a creamy, dreamy filling.
- Easy to Make: With simple ingredients and straightforward steps, this recipe is beginner-friendly.
- Perfect for Any Occasion: These bars are great for parties, holidays, or just as a sweet treat.
- Crowd-Pleasing: Both kids and adults will love the unique flavor and texture.
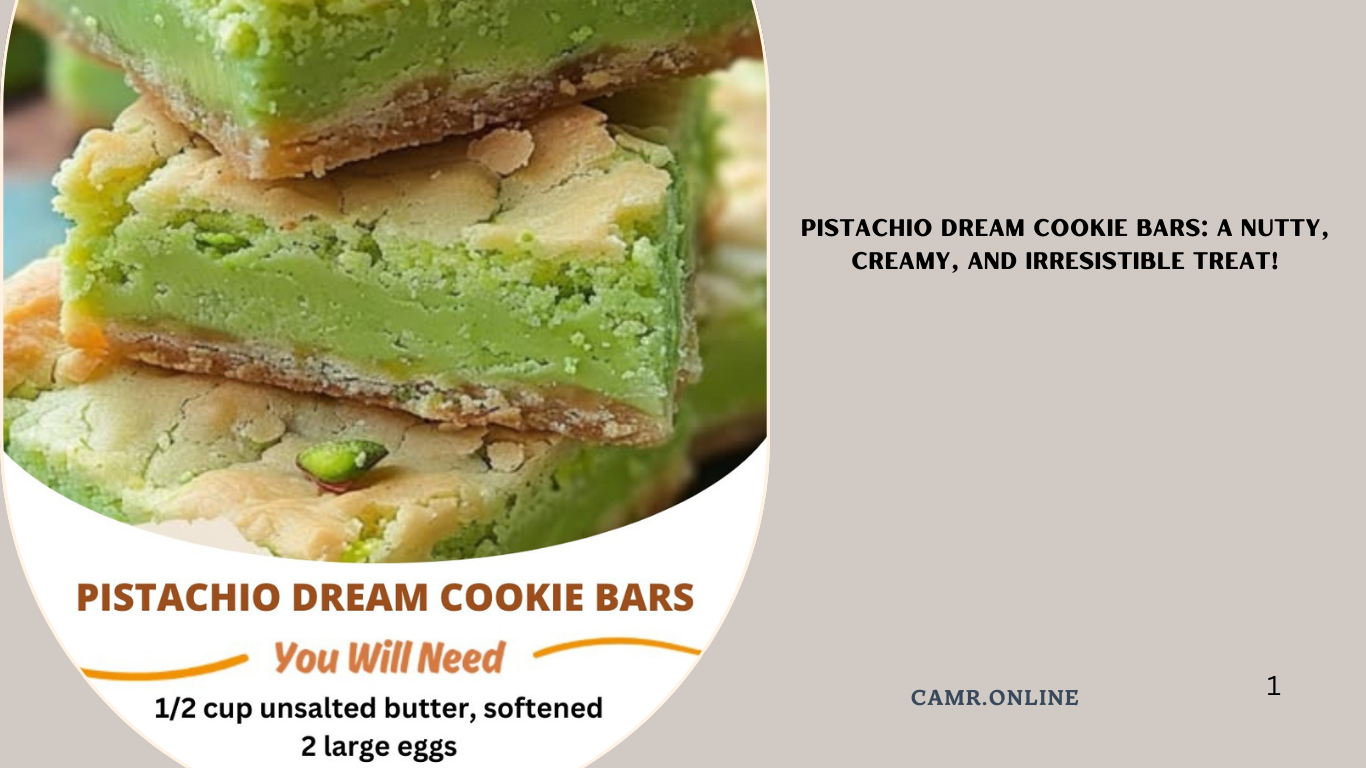
Ingredients You’ll Need
Here’s everything you’ll need to create these delicious bars:
For the Crust:
- 1 1/2 cups all-purpose flour
- 1/2 cup unsalted butter (cold and cubed)
- 1/4 cup granulated sugar
For the Filling:
- 1 package (3.4 ounces) instant pistachio pudding mix
- 1 cup cold milk
- 1 cup whipped topping (like Cool Whip)
For the Topping:
- 1 1/2 cups whipped topping
- 1/4 cup chopped pistachios (for garnish)
Step-by-Step Instructions
Step 1: Preheat the Oven
- Preheat your oven to 350°F (175°C).
- Lightly grease a 9×9-inch baking dish or line it with parchment paper.
Step 2: Make the Crust
- In a food processor or mixing bowl, combine the flour, cold butter, and sugar.
- Pulse or mix until the mixture resembles coarse crumbs.
- Press the mixture evenly into the bottom of the prepared baking dish.
- Bake for 15-18 minutes, or until lightly golden. Let it cool completely.
Step 3: Prepare the Filling
- In a large bowl, whisk together the pistachio pudding mix and cold milk until thickened.
- Gently fold in 1 cup of whipped topping until smooth and creamy.
- Spread the filling over the cooled crust.
Step 4: Add the Topping
- Spread the remaining 1 1/2 cups of whipped topping over the pistachio filling.
- Sprinkle the chopped pistachios over the top for garnish.
Step 5: Chill and Serve
- Refrigerate the bars for at least 2 hours, or until set.
- Slice into squares and serve chilled.
Tips for the Perfect Pistachio Dream Cookie Bars
- Use Cold Ingredients: Cold butter and milk help create the perfect texture for the crust and filling.
- Toast the Pistachios: Lightly toast the chopped pistachios for extra flavor and crunch.
- Customize the Flavor: Swap the pistachio pudding for vanilla or cheesecake flavor for a different twist.
- Make It Ahead: These bars can be made a day in advance and stored in the refrigerator.
Why These Bars are a Must-Try
These Pistachio Dream Cookie Bars are a unique and delicious dessert that’s perfect for any occasion. With their buttery crust, creamy pistachio filling, and fluffy topping, they’re a treat that’s sure to bring joy to every bite. Whether you’re serving them at a party or enjoying them at home, these bars are a must-try.
Frequently Asked Questions (FAQs)
1. Can I use homemade whipped cream?
Yes! Substitute the whipped topping with homemade whipped cream for a fresher flavor.
2. How do I store leftovers?
Store leftovers in an airtight container in the refrigerator for up to 5 days.
3. Can I freeze these bars?
Yes! Freeze the bars in a single layer on a baking sheet, then transfer to a freezer bag. Thaw in the refrigerator before serving.
4. Can I use a different type of nut?
Absolutely! Try using almonds or walnuts for a different flavor.
Final Thoughts
These Pistachio Dream Cookie Bars are a creamy, nutty, and indulgent treat that’s perfect for any occasion. With their simple preparation and irresistible flavor, they’re a dessert that’s sure to become a family favorite. Whether you’re serving them at a party or enjoying them as a snack, these bars are a must-try.
So, grab your ingredients and get ready to create a treat that’s as unforgettable as it is delicious. Happy baking!