Six of the Most Frequently Asked Questions
May I use whole wheat flour with all-purpose flour?
Indeed, whole wheat flour is a healthier replacement; nevertheless, be aware that the taste and texture might differ somewhat.
How long does the bread keep?
Best savored a few days after baking. Room temperature storage of it in an airtight container is possible.
Could I freeze the dough to use later?
Without a question! The dough may be shaped and then frozen, then boiled right out of the freezer anytime you want fresh bread.
For more flavour, may I add cheese or herbs to the dough?
Yes, most definitely! As you’re mixing, feel free to add cheese, herbs, or anything else you’d like.
Can I bake the bread straight out of the water?
Though baking the dough straight without boiling gives the bread its distinctive texture, the outcome could be different.
Prepare yourself to wave goodbye to bread from the store and welcome to the delights of homemade cuisine! You won’t ever need an oven to eat warm, fresh bread right out of your kitchen again with this easy recipe. Best wishes with your baking!\
Do you had enough of rushing to the supermarket whenever you want fresh bread? What if I told you you didn’t need an oven to create very good bread? You did indeed hear correctly! Make fluffy, handmade bread that will leave you wanting more with only a few basic ingredients and some boiling water. Let’s get right into this ground-breaking no-oven bread recipe that will transform your baking philosophy!
Overview
Without ever turning on an oven, picture the smell of freshly made bread filling your home. Now it is a reality rather than only a fantasy! This post will take you through a simple yet delicious recipe that will turn you become a bread expert.
Before we embark on our bread-making journey, let’s gather our ingredients and tools:

Ingredients
- ngredients:
- 5 cups of flour
- 2 cups of warm milk
- 1 cup of oil
- 1 tablespoon of dry yeast
- 1 tablespoon of granulated sugar
- 1 teaspoon of salt
- To Boil the Dough in Boiling Water:
- 2.5 – 3 liters of water
- 1 teaspoon of salt
Instructions
- Mixing the Dough
- Now, let’s get our hands doughy!
- Step 1: Activate the Yeast
- In a bowl, combine 2 cups of warm milk, dry yeast, granulated sugar, and salt. Mix until the yeast dissolves.
- Step 2: Incorporate the Oil
- Gradually add 1 cup of oil to the mixture while stirring continuously. Knead the dough for about 5 minutes until it becomes smooth.
- Step 3: Let it Rest
- Cover the dough with a cloth and let it rest for approximately 45 minutes until it doubles in size.
- Shaping and Boiling
- Once the dough has risen, it’s time to shape and cook our bread!
- Step 4: Shape the Dough
- Divide the dough into 6 equal parts and roll each part into a ball. Flatten each ball into a meringue shape, then roll it into a roll and shape the edges.
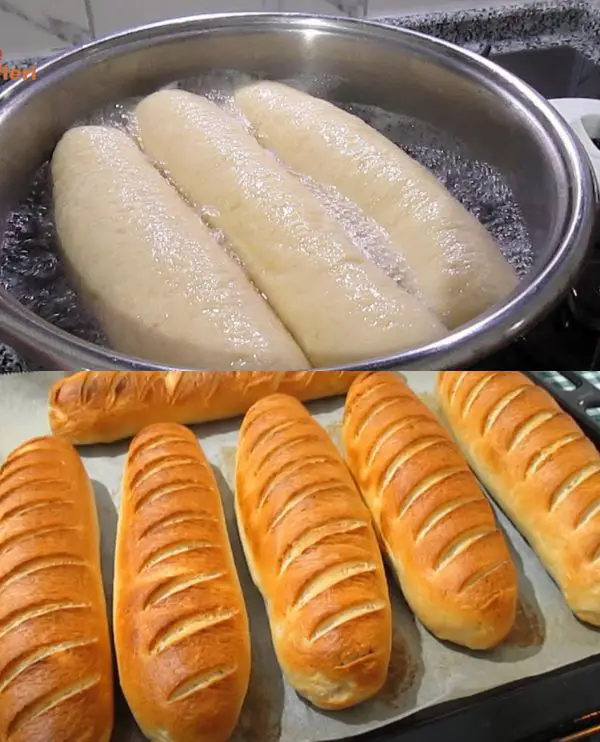
- Step 5: Boil the Dough
- In a deep pot, bring 2.5 – 3 liters of water to a boil and add a teaspoon of salt. Carefully place the prepared dough into the boiling water and let it cook for 2 minutes.
- Baking and Enjoying
- The final step is to bake and indulge in your homemade bread!
- Step 6: Bake
- Preheat your oven to 200 degrees Celsius. Transfer the boiled dough onto a baking tray lined with parchment paper, make some scratches on the bread, and bake for approximately 20 minutes or until golden brown.
- Step 7: Enjoy
- Once baked, let the bread cool slightly before slicing. Serve warm with your favorite spreads or enjoy it plain!